A proper shingle roof begins with structural checks, deck repairs, drainage planning, and a tear-off decision before any new material reaches the roof. By following the work in sequence, you can understand the tools, preparation, fastening, flashing, ventilation, and final inspections that determine whether the finished roof performs as intended.
Key takeaways
- Inspect the deck, ventilation, flashing, and existing layers before tear-off.
- Measure each roof plane and order shingles for waste, valleys, hips, and ridge caps.
- Align starter strips and fasten shingles within the manufacturer’s marked nail zone.
- Check edges, valleys, penetrations, exposed fasteners, and debris before handover.
What must be checked before the old roof comes off?
Before the old roof comes off, decide whether the deck can support a new covering and whether the existing layer qualifies for reroofing. Measure every roof plane, then calculate shingle quantities with extra material for hips, valleys, starter courses, ridge caps, and cuts.
1. Inspect the deck for rot, delamination, moisture, deflection, protruding fasteners, and uneven areas. Replace damaged sheathing; drive remaining fasteners flush and remove nails and debris. Shingles will telegraph deck defects instead of hiding them.
2. Leave one existing asphalt-shingle layer only when it is sound, local code permits reroofing, and the completed roof will not exceed the 2021 IRC limit of two asphalt-shingle applications. Curled, buckled, wet, loose, or poorly bonded shingles require removal. Remove or secure old roofing before covering the deck.
3. Check pitch and drainage. Standard shingles normally need at least a 2:12 slope; slopes from 2:12 to under 4:12 need the manufacturer’s enhanced underlayment detail. Confirm that gutters, valleys, and roof edges can shed water.
4. Confirm that intake openings and exhaust ventilation can function after installation. Blocked soffit vents or an obstructed ridge path can trap heat and moisture.
Asphalt roofing shingles roof preparation needs an early design and safety review when the roof has complex shapes, inadequate drainage, or steep slopes. Do not improvise those conditions during installation; resolve access, layout, structural repairs, and material quantities before tear-off begins.
Which materials and layout controls start the installation?
The asphalt roofing shingles installation process starts with the right materials and a controlled layout, not with the first shingle. Have these on site:
- Asphalt roofing shingles, roofing nails, a hammer or nail gun adjusted for the product, utility knife, chalk line, tape measure, pry bar, roofing cement, approved underlayment, ice-barrier membrane where required, metal flashing, drip edge, ridge-vent components, and replacement deck material.
Snap reference lines, mark course offsets, and follow the shingle package’s stated exposure. Starter strips fit along the eaves and usually the rakes, establishing the first-course overhang, adhesive position, and wind-resistance geometry. Manufacturer instructions control laps, edge details, exposure, and approved accessory compatibility.
| Layer or location | Purpose | Installation control |
|---|---|---|
| Eaves | Drip edge sheds water beyond the fascia | Coordinate it with the underlayment; do not add it over completed shingles as an afterthought |
| Eaves subject to ice dams | Ice barrier protects the deck from backed-up water | Under the 2021 IRC approach, extend it at least 24 inches inside the exterior wall line, subject to local code and product instructions |
| Roof field | Approved underlayment backs up the shingles | Use the specified laps; slopes from 2:12 to under 4:12 need the manufacturer’s enhanced detail |
| Rakes and penetrations | Metal flashing closes exposed edges and transitions | Follow the product’s edge and lap sequence |
| Ridge | Ridge-vent components support exhaust ventilation | Keep the vent opening aligned and unobstructed |
How are starter strips and field shingles fastened?
Fastening starts with a starter strip along the eave, and usually along the rakes. It establishes the first course’s overhang, adhesive position, and wind-resistance geometry; using a field shingle without accounting for its exposed tabs can create incorrect exposure.
These asphalt roofing shingles installation steps keep each course aligned:
1. Snap reference lines and mark the manufacturer’s stated exposure and offset. Lay laminated, strip, and designer shingles according to their separate offset requirements; random spacing and aligned vertical joints are not acceptable substitutes.
2. Place each field shingle course by course. Use the specified nail count, commonly four nails per shingle and six for high-wind warranties or higher design-wind zones.
3. Drive every nail through the marked nail zone, into the deck by the required depth, and flush with the shingle surface. A nail that cuts through the shingle, or extra nails placed elsewhere, does not correct a missed pattern.
4. Install shingles around eaves and rakes, then flash plumbing vents with a correctly sized boot. Continue course-by-course step flashing at sidewalls; a bead of caulk cannot replace layered, shingle-lapped flashing.
5. Follow the product’s temperature limits. Cold shingles can crack when sharply bent, while hot shingles can scuff under foot traffic, damage adhesive strips, or deform under pressure.
Keep release-film adhesive areas clean and use approved roof-access practices throughout the work.
How are valleys, roof edges, and difficult roof areas handled?
Choose one approved valley system and carry it through the entire roof; mixing details creates leakage paths. Keep fasteners away from the valley centreline, and cut shingles to the specified width.
| Valley system | How it is built | Main control |
|---|---|---|
| Open valley | Exposed metal or another approved valley lining remains visible | Keep shingle edges straight and fasteners clear of the lining |
| Closed-cut valley | Shingle courses cover the lining and are trimmed along one valley side | Follow the specified cut width |
| Woven valley | Courses from both roof planes interlace across the valley | Maintain the manufacturer’s weaving sequence and exposure |
Chimneys, skylights, sidewalls, and larger penetrations need the specified base, step, counterflashing, or cricket. A sealant bead around a pipe or chimney only supports maintenance; it cannot replace shingle-lapped flashing or a correctly sized vent boot.
Install ridge shingles or ridge caps after the upper courses. Keep ridge-vent channels open, continuous, and aligned with unobstructed intake openings at the eaves or lower roof edges. A ridge vent alone cannot move air through the attic.
Under the 2021 IRC prescriptive approach, provide 1 square foot of net free ventilating area per 150 square feet of ceiling area. The ratio can reduce to 1:300 only when the code’s balancing and vapour-retarder conditions are met; blocked intake vents defeat the calculation.
Slopes from 2:12 to under 4:12 need enhanced underlayment, not conventional-slope treatment. Steep roofs need approved access controls, while complex geometry or poor drainage merits professional design review before asphalt roofing shingles for installation are ordered.
What happens during the final inspection and cleanup?
The final inspection verifies that the roof sheds water, resists wind, and remains ventilated. Check nail placement, exposed fasteners, open laps, loose tabs, incorrect exposure, valley cuts, flashing transitions, ridge-cap alignment, and drip-edge continuity.
Use this handover checklist:
- Confirm intake vents and ridge vents are open, continuous, and free of insulation or debris.
- Check that factory seal strips have bonded. On shaded planes, in cold weather, after dust contamination, or before an approaching storm, apply compatible hand-sealing where the manufacturer permits it.
- Keep roofing cement out of drainage paths; excess cement can trap water and cannot compensate for missed or misplaced nails.
- Remove nails, shingle fragments, release film, and packaging without dragging tools across the granulated surface.
- Inspect gutters, walls, landscaping, and paved areas for debris before leaving.
Record defects rather than accepting a vague “complete” handover.
| Finding | Why it matters | Required response |
|---|---|---|
| Missed or high nails | Weak fastening and possible leaks | Correct to the manufacturer’s nail pattern |
| Open lap or loose tab | Wind can lift the shingle | Reseal or replace as instructed |
| Bad valley cut or flashing transition | Water can enter at a concentration point | Rework the detail before payment |
| Blocked ventilation | Heat and moisture remain in the roof space | Clear the intake or ridge path |
Before ordering, give Maratha Roofing Products the roof measurements, pitch, valley design, ventilation plan, shingle model and colour, nail specification, and manufacturer installation guide. The installer remains responsible for following that guide and local code.
Related product
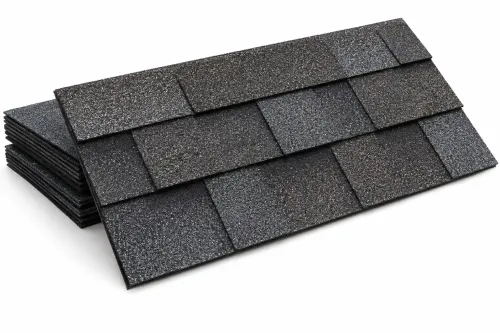
 | Asphalt Roofing Shingles Asphalt roofing shingles are a durable, cost-effective roofing solution known for their versatility and weather resistance. View product → |
Frequently asked questions
What must be checked before the old roof comes off?
Inspect the roof deck for rot, delamination, sagging, and weak fastener points. Check ventilation, flashing, penetrations, roof pitch, and whether local rules permit reroofing over the existing layer. Measure every roof plane and add material for cuts, valleys, hips, starters, and ridge caps.
Which materials and layout controls start asphalt roofing shingles installation?
Start with the approved underlayment, drip edge, flashing, ventilation components, compatible fasteners, and shingles. Establish the eave line, rake line, vertical chalk lines, and horizontal course marks so courses remain straight and manufacturer-specified exposure is maintained.
How are starter strips and field shingles fastened?
Install starter strips along the eaves and rakes according to the shingle manufacturer’s instructions. Place field shingles with the correct exposure, use the specified number of roofing nails, and keep every nail inside the marked fastening zone without overdriving or leaving heads proud.
How are valleys, roof edges, and difficult roof areas handled?
Install valley and edge flashing using the selected open-valley, closed-cut, or woven-valley method. Detail chimneys, skylights, vents, walls, hips, ridges, and low-clearance areas with compatible flashing and sealants, following the shingle manufacturer’s published method.
What happens during the final inspection and cleanup?
Inspect shingle alignment, nail placement, seals, flashing, ridge ventilation, valleys, penetrations, eaves, and rakes. Remove loose tabs, packaging, and metal scraps, clear gutters and downpipes, and document areas requiring correction before handover.
Keywords